No Excuses Now, Mister Fix It

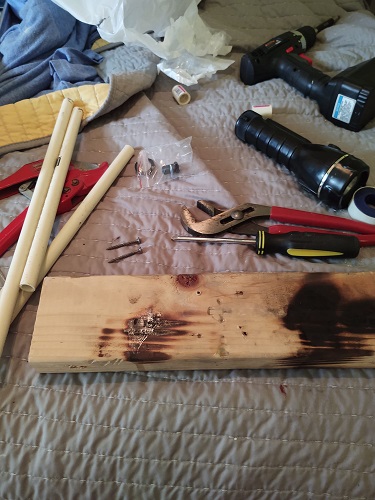
You may recall that last summer, my father-in-law and I tackled a plumbing issue at our house. That incident required us cutting up the drywall to access pipes. The results were not pretty.

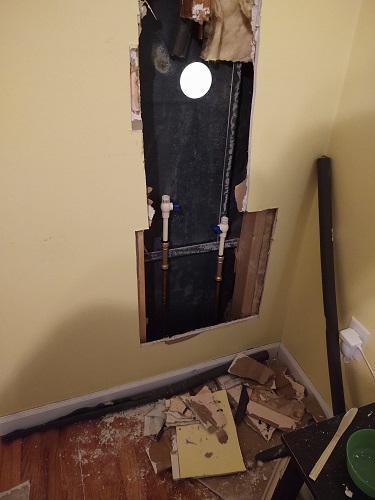
The above picture was taken during the project. We were able to get pipes fixed and the hole has remained in the wall ever since. This is partly because there is always someone sleeping in the bedroom where the repair has to be made.

I digress.

Way back in the summer, my wife asked me to apply for a Menard’s card. I kept meaning to do it. I was going to do it the last time I was in there, but I had both kids with me and they were anxious to leave.

After talking about the hole in the wall, and how I need to get an access panel for it, I decided to go on their website to apply for their credit card. I figured if I got approved for a couple hundred bucks, that was all I needed to get the things for the bedroom. Well, I was approved – for a much larger amount!

I have to really take a step back and remember that I don’t need to spend that much money. However, there are things that need to get done (and haven’t) because the budget didn’t allow for it. The access panel – has to be done.

The thing is going to cost like $50 and depending on the hole in the wall, and such, I may need to patch a bit of the drywall. $50! It’s a plastic door for crying out loud, but ok. I need to get it done.

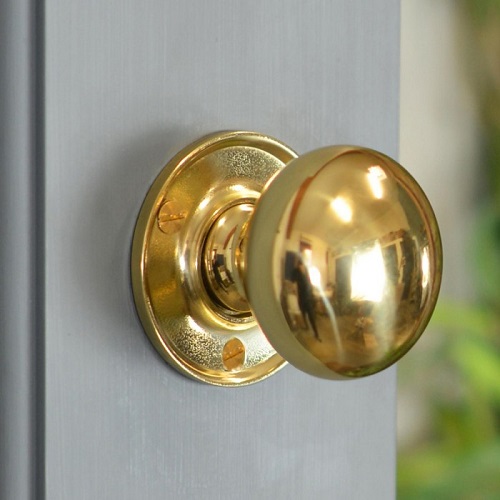
All of the doors in our house have the handles that look like this:

Personally, I like them. However, they are perfect for Andrew to get to – and open. Sam and I discussed switching them all over to the round brass handles.

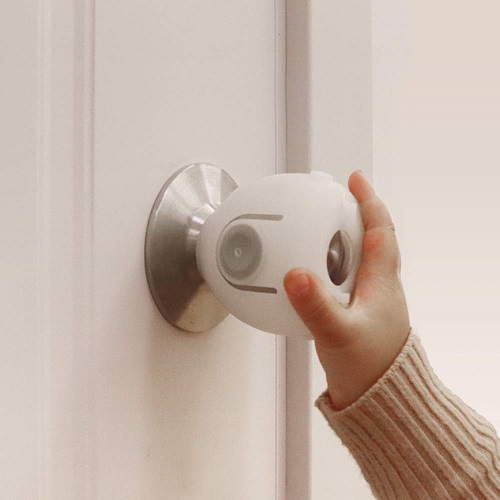
Some of them will have locks on them. Those will need to have the “easy unlock” from the other side, in case the kids lock themselves in a room. You know, the notch you can put a butter knife in and turn? And the round door knobs will allow us to put those childproof covers on that the kids can’t turn.

So, we have the access panel project and the door knob project. There are still a couple other projects.

Our bedroom had a ceiling fan/light fixture in it. The bulbs are all halogen and extremely hard to find. If you can find them, they are like $30 apiece. The entire fixture has 5 lights in it and currently only has one that works. Thank goodness for the lamp on my bedside table! Sam has been talking about getting rid of the whole thing and just putting in a regular light since we moved in together.

Something as simple as the light above – or something even more simple – would work. So that project is also on the list.

Finally, in our living room, the ceiling fan/light has needed to be replaced for some time. This should be an easy swap since we are just going to get another light/fan fixture.

At some point, we’d love to do something with the lighting in our kitchen, but that’s probably enough projects for now. Unless my father-in-law and I can figure out a way to build a deck in the back of the house really cheap! It couldn’t hurt to just price it all out, right?!

A Plumber I Am Not

Friday night I was at work and I got a text from my wife. It went something like this:

Sam: So there’s a leak in the shower.

Me: It’s probably the shower head. That’s an easy fix. I’ll look at it when I get home.

Sam: It’s not the shower head, it is leaking by the faucet handle.

At this point, I did what any guy would do – I called an expert – my father-in-law.

I’m not stupid. I know that if I had tried to do this on my own it would have been something straight out of a Three Stooges movie!

In texting my father-in-law, we thought this might be a couple hour job. He joked that the longest it would take would be a couple days.

He came over, as he always does, with a bag of tools and gadgets anticipating what needed to be done. Once in the house, he assessed the situation. He knew that there was an access panel behind the faucet in our bedroom. So the first thing we had to do was look inside that panel.

The panel was held in place by a simple nail. When the room was painted, the panel was painted over and so was the nail. I grabbed a butter knife and began to pry at the panel. It opened and my father-in-law reached in looking for the shut off knobs. We couldn’t find them. In all seriousness, he says, “We’re gonna have to cut the wall.”

We grabbed one of those box cutter razor things (my description of this tool in itself should be enough to give you a picture of my handyman skills!), and I began to cut a hole about where he told me to cut. Once we pulled that piece of wall off, we reached in again. “Nope, we need to go higher.” So I cut again.

We finally can see the place where the valve is. The shower enclosure is right up against the pipes and a bear to get to. They are copper, so my father-in-law says that we are going to put in new pipe, and shut offs.

As I look at the above picture, I wonder just how any expected any repairs to ever get done with that access panel so low! All we could see when we opened it was the two pipes!

After a few trips back and forth to the hardware store to get what we needed, we basically got things back up and together. We certainly made quite a mess, though.

Once things were ready, he went downstairs to turn the water back on. I wondered why he didn’t send me down there, but then figured he probably wanted me to get drenched if things weren’t right. Ha ha! The water pressure returned to the house and the shut offs to the shower were off. We checked it and there were no leaks. Now we could work on the actual faucet and shower head.

Getting the faucet and the valve lined up with the pipes was a bit of a challenge. Any time I have ever had to trim a pipe to make something fit, I almost always cut it too short. (One time I was putting in a laundry tub in our basement and I cut the pipe so short, I wound up putting bricks under all four legs to level it off!) I was glad to let my father-in-law do it. He got them exactly were they needed to be.

It looked like it would be smooth sailing from here on out, but naturally, there was one more bump in the road. For some reason, we couldn’t figure out why the handle was so loose every time we put it together. The instructions were worthless. I was trying to put it together with this silly little allen screw. It was easier to get to it with the handle turned up. Every time I did that, it was loose.

Both of us must have looked at that instruction manual for 30 minutes apiece. I noticed that the picture had them tightening it with the handle down and from the bottom. I guess I was afraid to lose this tiny screw down the shower drain, so I kept trying it from the top. Once I attempted it from the bottom it snugged right up and we were done with it. It still doesn’t make sense, but that is what it took.

Thankfully, the shower head went on with no problem whatsoever! We turned the shut off valves on and turned on the shower. Ta da! No leaks and everything was working. And so ended another project I would never been able to do without the help of Sam’s dad. Thanks, for your help, Tony!!

For the record, I am a bit jealous that my father-in-law didn’t let me use the blowtorch.